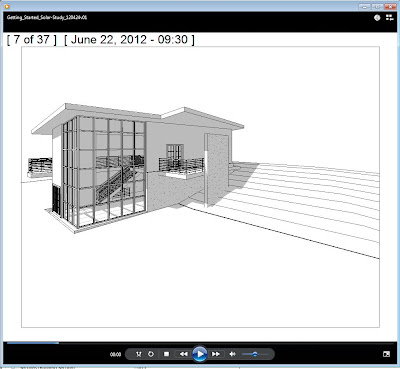
"create an animation of the solar activity at a particular place and time in order to study
the light and shadows that affect the building site."
1 Open a 3D view.
2 Adjust Shadow intensity, under View tab and Graphics panel, click the small arrow to the right of the word "Graphics" to open the "Graphic Display Options" dialog box. (keyboard shortcut = GD)
■ Under Shadow, verify that Cast Shadows is selected, and for Contrast, specify 24.
3 Modify the Sun Settings, Click the Sun Icon then, Sun Settings... to open the dialog box.
(the icon is in the Visibility settings menu at the bottom of the view screen)
4 select a city near your location, and click OK.
■ For Date, enter 6/22/2012.
■ For Time Interval, select 15 minutes.
■ Clear Ground Plane at Level so that the shadows fall on the terrain.
■ Click Apply, and then click OK.
5 Preview the solar study, click the sun icon to access this option.
6 Export the animation:
Click File menu ➤ Export➤Images and Animation➤Solar Study
Click ok to save the .avi file to the desired location.
Subscribe to:
Post Comments (Atom)


No comments:
Post a Comment