Tuesday, June 12, 2012

Basic Parametric Component (Family)

A Revit 2011 tutorial from youtube, courtesy of https://www.youtube.com/user/ddufon
Video link: http://youtu.be/on4LeYIuCis

Text walkthrough of video:
open generic model family template

Set family category and  parameters, can be anything you need. (Light fixtures is used in the video)

In Floor Plan View:
Draw reference planes for parametric ability, define/name them as their correct edges. Left is left, Right is right, Bottom (of screen) is front, Top of screen is back.

Go to Front view:
Draw two reference planes, one over the Ref. Level line (set it as bottom) and one 2' above, set as top.

In Floor Plan and Front View:
Add Aligned dimension between left and right, front and back and top and bottom reference planes, (4'-0" wide).
Cancel out of dimension command.
Modify / Select dimension, On the Options bar, select from the  Label: drop down box.
Name them Depth, Width and Height accordingly.

Note: be sure the dimension for Height is to the bottom Reference Plane not Ref. Level.

In Floor Plan and Front View:
Draw a 3d box with the extrusion tool.
Align and lock all edges to reference planes.

Open 3d view:
Add material and visibility parameter in the Family type dialog, click add.
After creating parameters, you must associate them with the object.
Select object, then set parameter association in properties box by clicking the small box to the very right of the parameter that you mean to set/modify.
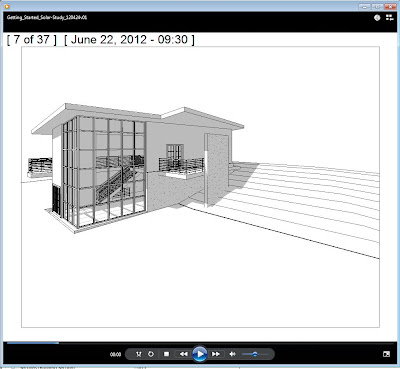


Tuesday, April 24, 2012

Revit Getting Started Guide: Creating a Solar Study

"create an animation of the solar activity at a particular place and time in order to study
the light and shadows that affect the building site."


1 Open a 3D view.

2 Adjust Shadow intensity, under View tab and Graphics panel, click the small arrow to the right of the word "Graphics" to open the "Graphic Display Options" dialog box. (keyboard shortcut = GD)
■ Under Shadow, verify that Cast Shadows is selected, and for Contrast, specify 24.

3 Modify the Sun Settings, Click the Sun Icon then, Sun Settings... to open the dialog box.
(the icon is in the Visibility settings menu at the bottom of the view screen)

4 select a city near your location, and click OK.
■ For Date, enter 6/22/2012.
■ For Time Interval, select 15 minutes.
■ Clear Ground Plane at Level so that the shadows fall on the terrain.
■ Click Apply, and then click OK.

5 Preview the solar study, click the sun icon to access this option.

6 Export the animation:
Click File menu ➤ Export➤Images and Animation➤Solar Study

Click ok to save the .avi file to the desired location.


Revit Rendering

I am experimenting with rendering, I will post links to helpful hints and some of my own findings as they come.
First few passes:


JPEG, High quality setting

First note, saving to TIFF loses the "sky" and JPEG retains it, no idea why yet. Will update when I find out.


Rendering resources from around the web:
http://revitclinic.typepad.com/my_weblog/2009/07/10-rendering-tips.html

http://revitclinic.typepad.com/my_weblog/2010/02/3-more-revit-rendering-tips.html


10 Revit 2011 Visualization Tipshttp://revitclinic.typepad.com/my_weblog/2010/05/10-revit-2011-visualization-tips.html